Tapioca Pudding

I am starting to think that maybe memories are like this dessert. I eat it, and it becomes a part of me, whether I remember it later or not.
— Erica Bauermeister

Tapioca Pudding with Berries

I've been thinking about how many women in history have worn strings of pearls.  Jackie O., Princess Diana, Grace Kelly, Coco Chanel, and the list goes on.  Why?

 Recently I had a strand of pearls that were a gift from my husband many years ago break.  It has such good memories surrounding it I did not want to leave it broken. I have worn it over the years and always receive such warm compliments and reminds me of the great memories I have with my other half.  

Single pearls are lovely but a strand of them is classic.  Life's ups and downs are often like a strand of pearls. Each one is unique and beautiful but together it is and elegant and strong. It makes a statement. Sometimes the down's in life feel like the broken strand.  Maybe if we start too look to closely at the individual pearls we might see chips or blemishes or flaws.  We do this too often to ourselves when we hurt or life has pushed us to it's limit. We all have chips and blemishes but, it isn't until we step away and start to see that all of the pieces can be put back together and be made beautiful again that our hurt begins to heal.  

Vanilla Bean Tapioca 

 No doubt it is difficult, after all the hole might be small and at first the string might be weak but with time we learn to buy the strongest cord and we ask for help to put it back together again.  In fact most of the time we need help stringing back together the little pieces.

 In life we need help too, from others that's what makes us a stronger person.  We need those who are experts to teach us how to thread the pearls, or make the knots, or even just to tell us don't worry, it can be fixed, and it will be beautiful again.

 I  chose to pick up the pieces and have a friend help me put it back together. It's stronger and more beautiful to me now than before.  Why? Because I stopped looking at the little flaws and started looking at the big picture.  

Tapioca Pudding with Strawberries

Now I can look in the mirror and see the strand of pearls together lying flat against that little black dress and say I love your Beauty, every little flaw and every little blemish, because together you make Me shine.

Speaking of Pearls...Tapioca Pearls make Delicious Eating.  

Enjoy!

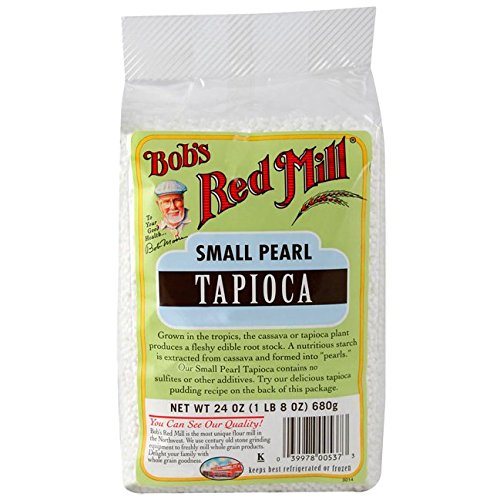
Recipe from:  Slightly Adapted from Bob's Red Mill classic Old Fashioned Tapioca Pudding

Ingredients

  • 1/3 cup Small Pearl Tapioca
  • 3/4 cup Water
  • 2 1/4 cup  Whole Milk
  • 1/4 tsp Salt
  • 2 eggs,separated
  • 1/2 cup Sugar,divided
  • 1 Vanilla bean, sliced in half and scraped or 1/2 tsp Vanilla Paste

Instructions

Step 1

Soak the 1/3 cup pearls in 3/4 cup water making sure it is large enough saucepan. (Around:  1 & 1/2 quarts can hold) DO NOT DRAIN TAPIOCA AFTER SOAKING!

Step 2

Add milk, salt, 1/4 cup sugar and lightly beaten egg YOLKS to Tapioca pearls and stir over medium heat until boiling. Then turn down heat and simmer uncovered over very low heat for 10-15 minutes.  Stir often and do not let come to  a boil again.  

Step 3

In a mixer using a whisk, or whisking by hand beat egg WHITES with remaining  1/4 cup sugar until soft peaks form.  Fold about 3/4 cup of HOT tapioca into egg whites slowly and then gently fold mixture using a spatula.  Fold mixture all together into saucepan slowly.  Stir over low heat for about 3 minutes.

Step 4

Cool 15 minutes then add Vanilla Bean or Vanilla Paste.  Serve warm or chilled with Fresh Berries of your choosing. You can also top with a little whip cream if you would like. 😋 

Berries and Tapioca Pudding

Lamb Quiche

Always remember: If you’re alone in the kitchen and you drop the lamb, you can always just pick it up. Who’s going to know?
— Julia Child
Jerusalem: A Cookbook
By Yotam Ottolenghi, Sami Tamimi
Buy on Amazon

  One of my favorite dishes  at a little place in North Carolina called Neo Monde  is called Mejadra.  Mejadra, aka: lentils, rice and fried shallots.This, became my love for what I called foreign food, but for millions was a staple.  Blending spices and flavors to arrive at just the right scent, not to powerful,not to blah.  Then there was lamb. Eat lamb? Why would I do that?  They were cute balls of fluff in fields across lands of green according to the television.  That is until I ate my first shawarma and learned I was eating lamb. Those little white poof balls were good, no, incredible!  Lamb had flavor, fat and if not overcooked melted in your mouth better than any m&m.  Thus, my love affair with middle eastern food began, and continued.  My little world of pizza, spaghetti, mac n' cheese, fried rice and cheese pancakes had been shaken.  I began to seek out how to books on creating my own middle eastern food. I met a friend from Lebanon who introduced me to every Arabic market in town.  I discovered the Jerusalem Cookbook by Yotam Ottolenghi  which pushed me beyond my limits. I searched out spice shops near and far the way a kid looks for candy shops and asks to go to just one more. Cooking with spices is like playing with legos you never know what your gonna build until your finished. Thus I arrived at this Lamb quiche which will bring your taste buds to their peak. Happy Brunch Lunch or Dinner!

What no Lamb Quiche?!

screenshots from food blogger pro

This Quiche is inspired from the Jerusalem Cookbook Recipe Stuffed Eggplant with Lamb and Pinenuts

Ingredients:

Interior Quiche:

  • 45 ml olive oil/3 TBSP

  • 1 1/2 tsp ground cumin

  • 1 1/2 TBSP sweet paprika

  • 1 TBSP ground cinnamon

  • 1 tsp Aleppo pepper

  • 2 medium onions/ 340 g in total/ finely chopped

  • 1 lb/ 500 grams ground lamb

  • 7 TBSP/50 grams pine nuts

  • 2/3 oz/20 grams flat-leaf parsley, chopped

  • 2 tsp tomato paste

  • 8 oz feta cheese

  • 1 tsp sugar

  • Eggs: 3-4 large

  • Sour cream or Creme Fraîche: 3-4 large heaping Tablespoons

  • Salt:(kosher) 1 tsp

  • Pepper: (fresh ground) 1/4 tsp

Crust:

  • 10 oz (2& 1/2 cups)f All purpose non-bleached flour- scooped and leveled

  • 6 oz (1 & 1/2 sticks) softened butter

  • 1/2 teaspoon of Kosher salt

  • 2 oz ( 3 to 4 tablespoons) water

Instructions  for Crust:

  • Sift or whisk instead the flour and the salt in a bowl.

  • Cut the butter in small dices.

  • Mix quickly the flour and the butter with the Tips of your fingers

  • Add water one tablespoon at a time, until dough resembles crumbs.

  • Do not mix the dough for more than 7 min, otherwise the dough will break and it will be impossible to form a ball.

  • When the dough is smooth and homogeneous, put this ball in the refrigerator for at least 1 hour before rolling.

  • Preheat your oven to 425 degrees Fahrenheit or 230 Celsius.

  • Remove the dough from the refrigerator and let it rest until you can easily cut the dough in half.

  • Butter inside of the quiche pan using softened butter - Make sure to completely cover the inside

  • Dust flour inside of quiche pan, tapping out excess flour.

Rolling out the dough:

Step 1

Dust flour upon a flat surface and using a rolling pin dusted with flour begin to roll out the dough. You can make the crust as thick or thin as you like depending on what other ingredients you will be putting inside of the quiche. While rolling out your crust it is a good idea to turn the crust over onto the other side. The rolling pin works well for turning the crust over. This will allow you to make sure that your crust is not sticking to the flat surface. Continue to dust with flour as needed.

Step 2

After crust is rolled out to desired thickness (I prefer thin), roll the dough onto the rolling pin and unroll into prepared crust pan. This can be tricky but just think of it as rolling up a blanket then unrolling with excess dough laying over the sides of the pan. Flatten crust into pan until all sides and bottom of the pan are covered. Then using a knife, cut off excess dough. Next take a fork and poke holes using fork prongs into bottom of crust until bottom of crust is covered with holes. 

Step 3

Fill quiche with dried beans to weigh down crust. I use a cheese cloth filled with black beans. After oven has preheated place crust inside of oven on middle rack for  10 minutes. Remove crust from the oven. Remove beans and let crust cool while continuing preparation of quiche.

Lamb Mixture:

Heat 2 tablespoons of olive oil in a large frying pan. Mix together the cumin, paprika, Aleppo pepper and ground cinnamon and half of this spice mix to the pan, along with the onions. Cook over medium-high heat for about 8 minutes, stirring often before adding the lamb, pine nuts, parsley, tomato paste, 1 teaspoon of sugar, 1 teaspoon of salt, and some black pepper. Continue to cook and stir for another 8 minutes, until the meat is cooked.

Making the Quiche:

  1. Combine the eggs, cream, salt and pepper. I use a hand held blender, but you can also whisk by hand. After blending together it should be a light yellow in consistency, like the color of eggnog. You should not see any dark yolk or white cream on the sides. If it is too light in color, you may need to add the 4th egg. If it is too yellow in color, you may need to add a little more cream.

  2. Whisk in one Tablespoon of feta cheese to blended eggs and cream. Set aside the rest of the cheese.

  3. Add lamb mixture to the empty crust.

  4. Next  pour the blended mixture of eggs/cream into quiche pan. This should fill the crust shell about halfway or a little more.

  5. Sprinkle  remaining feta over the blended egg mixture. 

  6. In a 400 degrees Fahrenheit oven place quiche pan on a baking sheet to prevent spillage and leave in oven for 25 minutes. You will see the quiche "pop" or puff up, this is a good thing! 

  7. Before removing quiche check using a knife if the quiche is cooked all the way through. If the knife after inserted in the middle comes out clean your quiche is done. If not give it 2-3 minutes more and check again. Continue until your knife comes out clean. Remove quiche and let cool for 10 minutes before slicing.

Tips

  • You can make your crust the day before and still add your filling the next day.

  • Serve quiche warm or cold for breakfast, lunch, or dinner.

  • No rolling pin? No problem use a bottle of wine, then drink it later with your quiche.

  • Place dried beans inside of cheese cloth and tie with cooking twine then place inside of crust. This helps decrease the mess of trying to remove the beans! The cheesecloth should not burn, since it is only 10 minutes at a time, but keep an eye on it the first time.

  • Use an aluminum pie pan from the dollar store when you are bringing your crust to a party. No need to worry about your favorite dish getting lost.

  • If using a quiche pan, place it on a baking sheet to prevent crust pieces falling onto bottom of oven. Less oven cleaning!

  • Make sure oven is at proper temperature. Do not rely on preheat button. Invest in an oven thermometer.


Special Equipment:

  • 10' Quiche pan

  • rolling pin

Serve with:

  • Light mixed green salad with vinaigrette

  • Red Pinot noir or Syrah


Peppermint Marshmallows

Last night I dreamt I ate a ten pound marshmallow. When I woke up the pillow was gone.
— Tommy Cooper

Peppermint Marshmallows

Marshmallows are one of those things I didn't know people made from scratch until I became an adult.  Mind blowing for some of you, I know, right? For others: maybe you're thinking people make marshmallows?

For the latter I am with you.Marshmallows  always come out of a bag right?

As a kid we could get miniature or regular size, never mind Jumbo.  This was non-existent.  They were also a very specific item that seemed to only be purchased in our house for a few things.

  • Rice crispy treats
  • Hot Chocolate
  • S'mores
  • Fruit Salad

  That was it. The extent of the marshmallow world.

We never bought the marshmallow fluff I have no idea why.  Less healthy, maybe? 🤣

Rice Krispy box always said to buy a bag of marshmallows on the back never the fluff?  I am not sure.  But one thing was certain we always bought the regular size.  Mini marshmallow were strictly for fruit salad😜 

What did you use marshmallows for as a kid?

So back to this concept of making your own marshmallows.  I started thinking about it a few summers ago when I was getting into fancy s'mores  I had made salted caramel peach s'mores for a picnic and thought why don't I make the marshmallows too?  I made the caramel and cut up the peaches but not having much time I put it on the back burner.

Next time I thought about it a friend was visiting and we thought it would be fun to do together.  They were a bit of a flop.

 Lessons were learned however and I decided to try again because I couldn't believe people were selling them at the store for $6 for 4 marshmallows?  

 I passed on the $6 marshmallows and started my google searching for marshmallow recipes.  Turns out Ina Garten had a simple no fuss and with a handy video on how to make them.  My first batch were great.

 So then back to the drawing board.  I didn't want to do the all corn syrup thing so decided to go in with what is going around these days as being the healthier sweetener. Agave Syrup.  I was a little afraid they would taste weird so I did do half and half and they were good.

 Really good.

 As in marshmallow heaven good.

 Fluffy and large and you want to just eat it straight up.

 Not like the marshmallows in the plastic bags.  I was in the know as to why people made their own now.

 So one more addition needed to be made.  I wanted flavor something fun and great not overwhelming but that would make them memorable.

 I love peppermint patties so I decided to go with peppermint.  I bought peppermint oil at the store the kind that smells amazing and makes you want to lick the little bottle.  

Turns out peppermint marshmallows are kind of amazing especially in Hot chocolate!

 Next up dreams of peppermint marshmallow  s'mores!  

 Keep coming back because summer is around the corner and you never know how dreams may come true?


Ingredients

  • 3 packages of unflavored gelatin
  • 1 cup  water
  • 1  1/2 cups sugar
  • 1/2 cup corn syrup
  • 1/2 cup agave syrup
  • 1/4 tsp kosher salt
  • 1 tablespoon peppermint oil
  • 1/2 tsp vanilla
  • Dusting confectioners sugar aka powdered sugar

Peppermint Marshmallows

Instructions

Step 1

Combine the gelatin and 1/2 cup of cold water into the electric mixer bowl fitted with a whisk and let sit.

Step 2

In a medium saucepan over medium heat combine sugar, 1/2 cup water, corn syrup,agave syrup, and salt and cook until sugar dissolves.  Next raise the heat and cook until temperature reaches 240 degrees F. with a candy thermometer or high heat for cooking thermometer such as a Thermapen. (My favorite thermometer) Remove from heat. Pour into a heat proof pouring measuring cup.

Step 3

With the mixer on LOW slowly pour the sugar syrup to the gelatin mix. Once mixed in and no splashing of hot liquid will happen increase mixer to high speed for about 15 minutes until looks like marshmallow fluff, nice and thick.  Stop speed and add peppermint and vanilla. Mix again for about one minute.

Step 4

While mixer is going dust with powdered sugar using a sieve an 8x12 inch non-metal pan. Pour the marshmallow mixture into the pan and smooth the top using a flat spatula or cake spatula. If you want it green on top add a few drops of green color all around and with spatula or butter knife stir in streaks to look like marbling. Cover lightly with a dusting of powdered sugar.

Step 5

Leave uncovered overnight to set and dry out. The next day turn the marshmallows onto a cutting board and slice into squares using a sharp knife.

Tips

  • Marshmallows freeze great!  You can freeze individually on a sheet pan laid out for about 20-30 minutes then place in a ziploc bag all together.
  • If you want the color green throughout add to the mixture the food color.
  • Make ahead and have these ready for any time you need marshmallows.  
  • Making your own ice cream? Add  toasted peppermint marshmallows and chocolate chunks for that raging sweet flavor!

Hope all your marshmallow dreams come true!


Â