Tomato Tart

Knowledge is knowing a tomato is a fruit. Wisdom is not putting it in a fruit salad.
— miles kington

Tomato Tart

What was on your Summer Bucket list this year? 

  • 🍦Make Homemade Ice Cream βœ…

  • πŸš΅β€β™€οΈTake a Bike Ride βœ…

  • πŸ‰ Have a Picnic βœ…

  • πŸŒ„ Watch the Sunrise βœ…

  • πŸ—― Make Giant Bubbles βœ…

  • πŸ• Go Backpacking βœ…

  • 😎 See the Eclipse 2017 βœ…

  • πŸ”₯ Have a Bonfire βœ…

  • πŸ‡ Go to a Vineyard βœ…

  • πŸ… Make a Tomato Tart βœ…βœ…βœ…

You still have time to finish off your List and make this amazing Tomato Tart because officially summer doesn't end until September 22nd!

Why is it that we always have a Summer Bucket List but never get around to doing hardly anything on the list?  Somehow it passes and yeah we might have gone hiking or ate a s'more or two but we seem to miss out on the simple things like playing with bubbles or watching the stars outside.

 Summer seems to come to an end when school starts and yet for most of us school isn't starting in fact, it's still the same week as last week with work on Monday and ending on Friday.  So don't let your work week keep you from this good news: the sun is still shining and it is still a little warm. You still have time to have some fun!  

Do you have something on your bucket list you haven't checked off yet?  Pick one thing and do it, NOW!  Your kids will love you, because you just extended summer and showed them that it's okay to have a picnic, or make homemade ice cream in September.

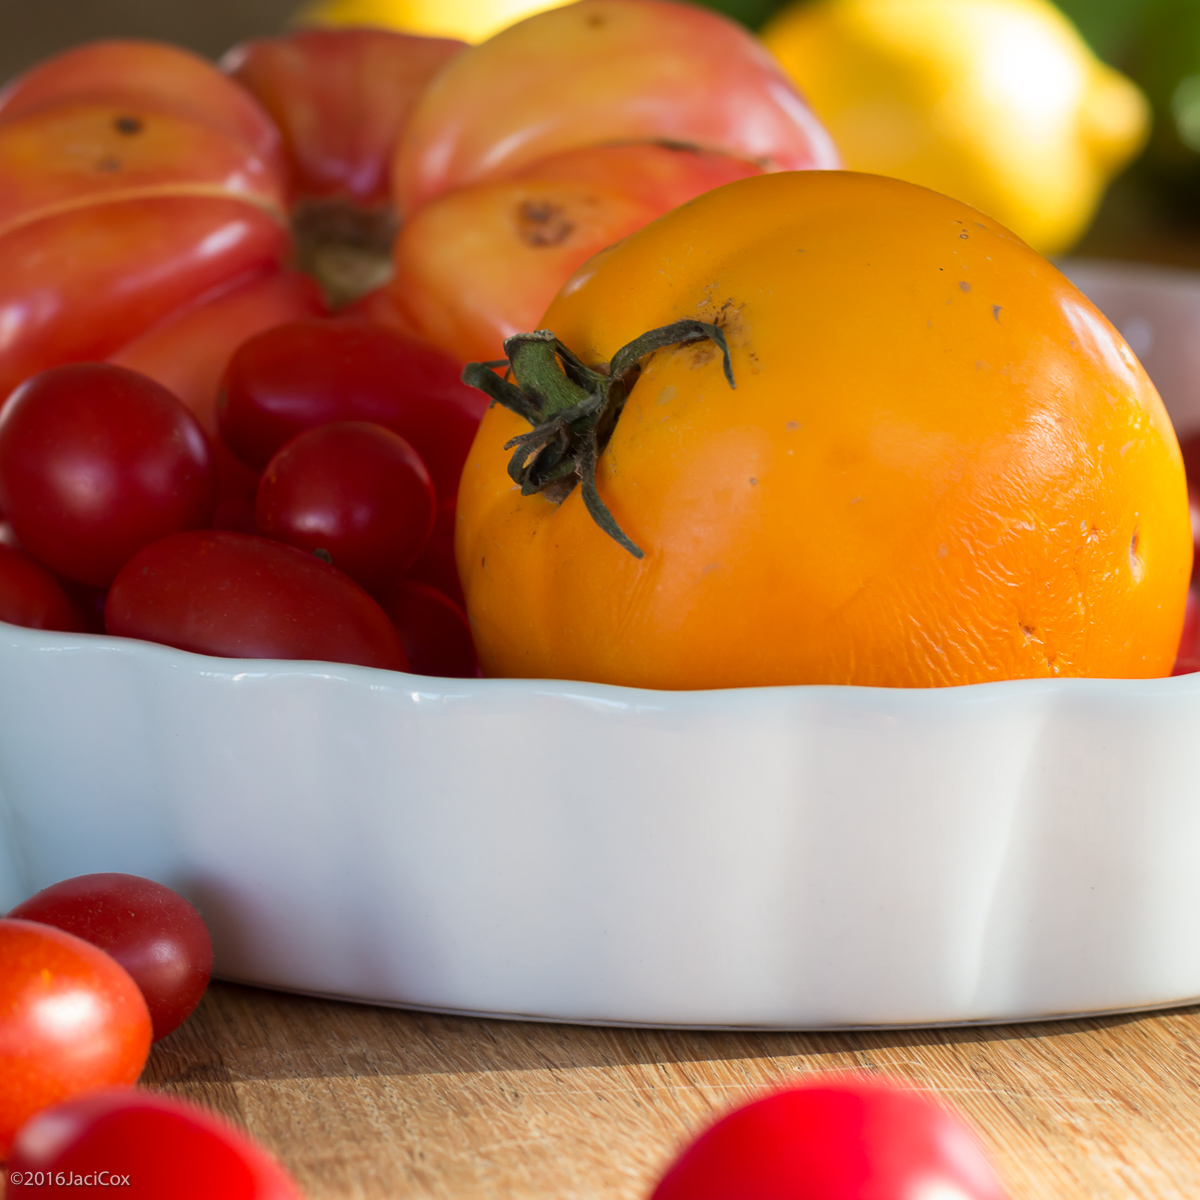
  It's okay to make a plan to go outside and stretch the limits of summer.  In fact maybe your summer tomatoes are just now coming to their peak.  That is definitely the case if you live in the PNW.  It takes September for the tomato to be at it's best.  

Whatever you do make sure you take some time to smile 😊 and enjoy a little something you love because after all that's what a bucket list is all about. 

And remember the Fall Bucket List is just around the corner...πŸπŸ‚πŸ

Ingredients

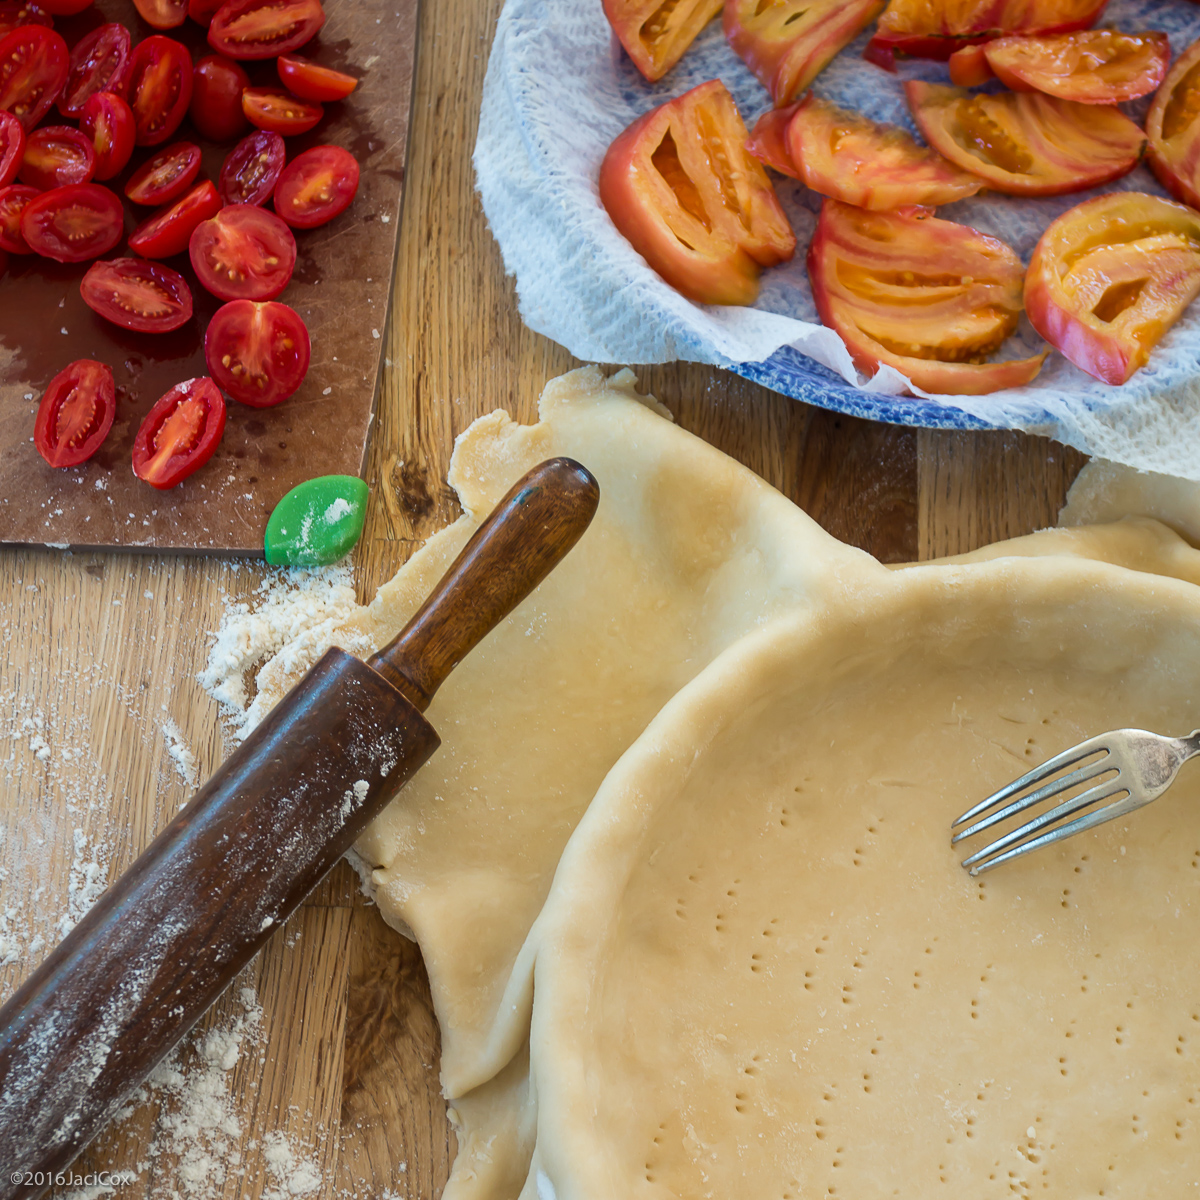
  •  1 PIe/Tart Crust (Get Crust Recipe Here)

  • 2 Tablespoons Dijon Mustard

  • 2 Tablespoons Grain Mustard

  • 1 teaspoon olive oil

  • 1-2 teaspoons dry herbs de provence 

  • 2 large Heirloom Tomatoes

  • 1 pint small tomatoes

  • Salt- 1-2 teaspoons for draining tomatoes

  • Fleur de Sel or finishing salt to taste

Step 1

Make Crust and pre-heat oven to 425 degrees. Pre-bake crust for  10 minutes.  Slice large tomatoes and place on paper towels and salt.  Allow salt to drain tomatoes of liquid then pat dry. 
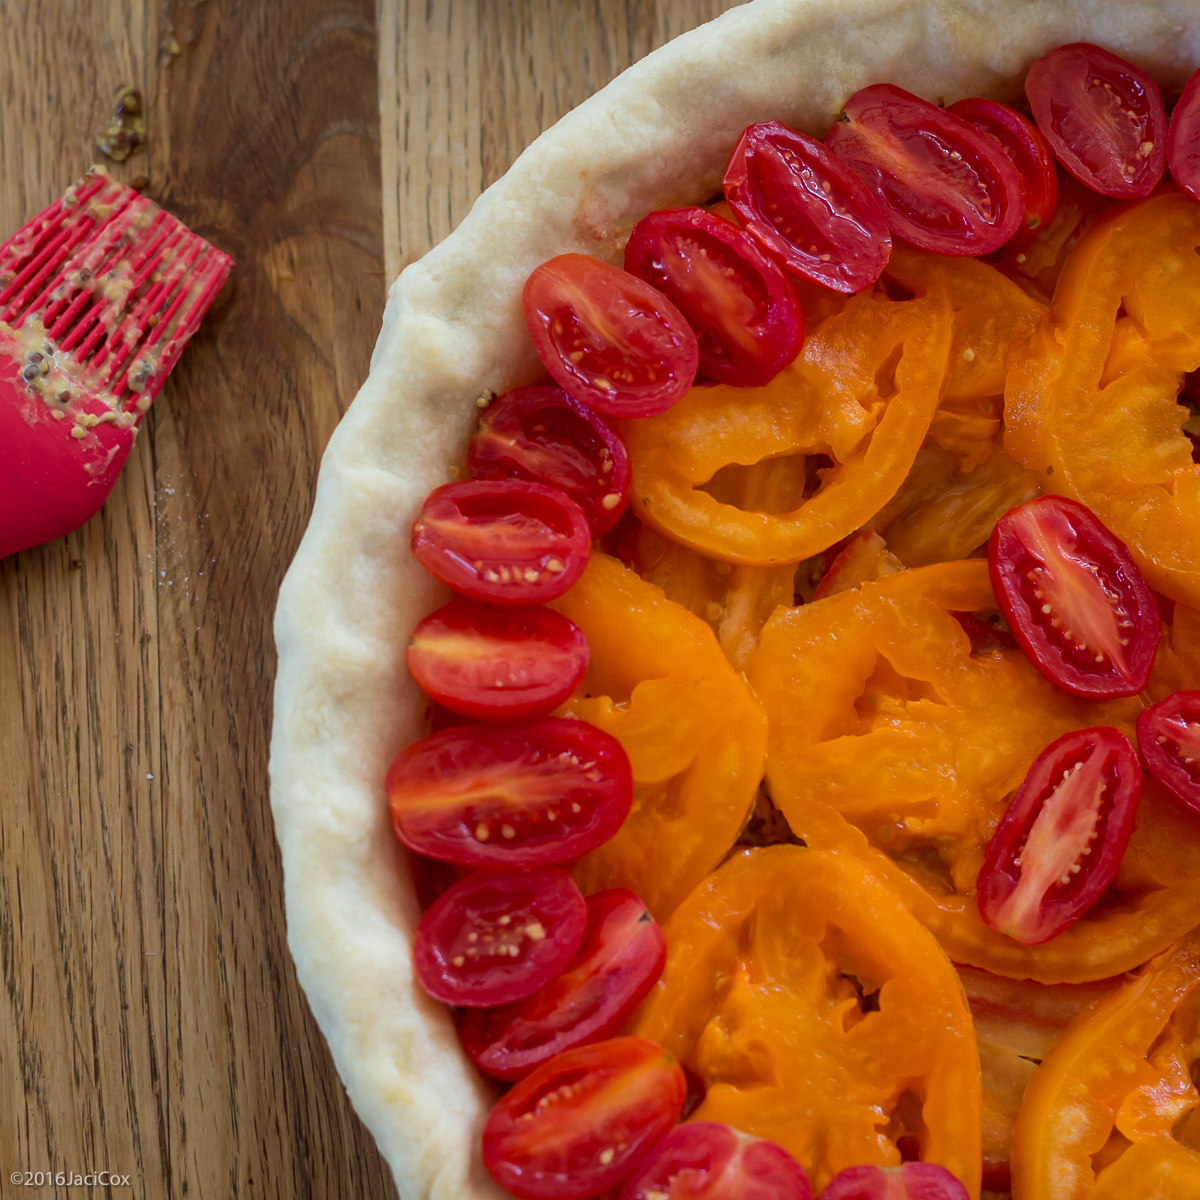
Step 2

Mix mustards together in a small bowl. After crust cools, using the back of a spoon or a brush, brush mustards onto bottom of pre-baked crust.  Next layer tomatoes on top of mustard.  Sprinkle herbs over tomatoes and drizzle olive oil.  

Step 3

Bake tomato tart for about 30 minutes at 400 degrees or until crust is golden brown and tomatoes have shriveled slightly. Finish with Fleur de Sel to taste.

Tomato Tart with Mustard


Tips

  • Tomatoes can be pre-sliced and salted up to 1 hour prior and allowed to drain

  • Choose the best tomatoes you can find as this is your prime ingredient

  • Now is the time to use those slightly overripe tomatoes

  • Add a little fresh basil afterwards on top and serve with a salad dressed in a vinaigrette

  • A nice Dry RosΓ© goes wonderfully with this summer tart

Strawberry Shortcake

Seize the moment. Remember all those women on the β€˜Titanic’ who waved off the dessert cart.
— Erma Bombeck

Strawberry Chocolate Shortcakes

Whirlpools and Whip cream have a lot in common. 

Small hot tubs make the most amazing whirlpools when you’re a kid. They feel like the size of a giant swimming pool when you are only 3 feet tall. I will never forget bobbing up, down and around my best friend's hot tub.  The water was cool, not hot, because it was our pool for the summer. We would walk and even run in the water to get the water spinning into giant circles.

   Our swimsuits were ragged with chlorine and faded from the sunshine, but around and around we went not stopping until the moment when we were being "whipped" so hard we would feel the water pull us back. 

Next, we stopped, and  we drifted.

We let the pool water float around our little bodies and occasionally our shoulders would hit the silver pole that was meant for the β€œadults” to enter.  The entry and exit bar was our personal monkey bar.  Swinging and ducking we would fall, sinking deeper into our floating whirlpool.

Eat Strawberry Chocolate Shortcakes!

Children's dreams are made from these moments, don't you think?  

What did you do? What is your favorite childhood memory? Do you have one to share?

 I have moved on to creating foodie dreams in my head. 

If whirlpools could be whip cream that’s the feeling I get when it has been whipped fully.  Small peaks and valleys of white float by my beater.  I love whirlpools to this day and hot tubs even more.

That round and round feeling continues and doesn't stop.  I watched a chef  make whip cream by hand one time, whisking and whisking, building amazing arm muscles, beating round and round until the cream began to peak. 

I don't beat my cream by hand, lazy? Nah, I like to think more inclined to value my time is all.  But I know how to whip cream by hand and that's what's important.  

Do you own a whisk? Good, you can make whip cream.

ICO Professional Whipped Cream Dispenser (1 Pint)
$29.99 $41.99
Impeccable Culinary Objects (ICO)
Buy on Amazon

Do you own an  electric beater or even a Kitchen Aid machine with a whisk attachment?  Great!

 Are you a crazy foodie and own a whip cream machine?  Even better! (P.S. They make amazing gifts.)

Whatever you happen to own you can make chocolate whip cream and bring something new for the next backyard party.

 People are going to ask you for the recipe.  I mean it, it's happened. 

They will want to lick the spoon, the plate and wel,l you will be the life of the party all because you found out a little secret from the white radish.  Share it, it's okay.  My secret is now yours and you don't have to keep it, cause it's too good not to share.

This is the simplest dessert you will ever make.  You can serve it with the homemade biscuits or for a gluten free option just remove them. Or if you don't have time, grab some angel food cake at the store or some premade biscuits, it will be good too. No one will be the wiser.

 This dessert has options and that's what we are all about, right?  

Make it simple, make it good, but make it!  

Show off your newly acquired skills of learning how to make chocolate whip cream.  If you don't get a few oohs and aahs then something is wrong with your friends, not you.πŸ˜‰  After all who doesn't love chocolate and strawberries?  It's a love story at it's best.

 Oh and just in case you have extra chocolate whip cream, don't miss out on the tips below.

And next time you are sitting in a hot tub I dare you to make a whirlpool and not think of chocolate🍫 whip cream...πŸ˜‰πŸ˜„

Summer Berry Shortcake


Ingredients

  • 1 pint Strawberries

  • 1-2 tsp sugar

Biscuits-

  • 4 cups Flour (self-rising prefered if you have it)

  • 1 tsp Salt

  • 4 Tablespoons Sugar

  • 1 Tablespoon Baking Powder

  • 1 cup of Heavy Cream and or Whole Milk

  • 1 cup or one 8 oz container of Whole Milk Ricotta

Whip Cream-

  • 1/2 pint Heavy Cream

  • 1-2 TBSP Organic Cacao powder or Unsweetened cocoa powder (depending on your chocolate taste)

  • 1 tsp Vanilla Extract

  • 4-5 tsp Sugar (or to taste)

  • Chocolate Shavings (optional)

Fresh strawberries

Instructions:

Step 1

Chop up strawberries and place in a large bowl.  Mix with Sugar and set aside in refrigerator for 30 minutes.

Step 2

Heat oven to 425 degrees Fahrenheit. Make Biscuits. Combine flour, baking powder, salt, and sugar in a large bowl.  Whisk gently or stir with a fork.

Step 3

Next add Heavy Cream and Ricotta and mix gently by hand until combined and forms a large ball.  You can add more cream 1 tsp at a time as needed, if flour is not sticking. You want to end up with a dough ball. Knead ball for one minute on a lightly floured surface. Flatten dough using your hands and make it about 2 inches thick. Cut out using a biscuit cutter round dough pieces.

Step 4

Place the biscuits on a cookie sheet and brush the top with milk or cream lightly. Bake until browned about 12- 15 minutes. 

Step 5 

While biscuits are baking, prepare chocolate whip cream. In a mixing bowl or kitchenaid bowl lightly whisk in chocolate and sugar and vanilla. Taste and add more sugar or cocoa as needed.  Start on low speed using whisk attachment and mix until begins to thicken.  Turn up speed being careful not to splash and whip until soft peaks form. 

Step 6

 Slice biscuits in half when cooled and smother with chocolate whip cream and layer strawberries. Top biscuit and add more cream and strawberries. Serve and Eat!

Optional: Top with chocolate shavings 

Tips

  • Extra Chocolate whipcream can be used in a shot of espresso for an "espresso con panna au chocolate"

  • Extra biscuits- freeze before baking on a baking tray for 20 minutes then remove and place in ziploc bag or other container for future biscuits


Pumpkin Nut Bread

Vegetables are a must on a diet. I suggest carrot cake, zucchini bread, and pumpkin pie.
— Jim Davis, β€˜Garfield'

Pumpkin spice Nut and Seed Bread

The one thing about having the gas off for three weeks is that I spent more time at our little neighborhood coffee shop eating their squash bread that I love.

However as much as I love walking up to have a slice, the $3.50 cost made my wallet slim.

So my mind drifted back to that little voice in my head that says: "You could make it yourself."

  I am more than well aware that part of eating out is the experience and I do love that they play soft jazz or sometimes classical which is my favorite at a coffee shop because then I can work without getting any songs stuck in my head.  

Side bar on songs stuck in your head...I learned a little known fact the other day from a friend that if you learn the words to the end of the song stuck you can remove it from your brain. Psychologists have even given a name to the phenomenon it's called an Earworm. 

Wierd, right? Something about our brain needing closure...made sense to me. So next time you have "Don't Stop Believing..." by Journey or "It's a Small World...by Disney look up the song lyrics and find out the end.

Okay back on topic, hope you don't have any earworms hanging out.πŸ˜‰  

After deciding I could make my own squash bread and searching around a bit since I knew the basic recipe was from Macrina Bakery a fantastic bakery in Seattle.  I decided to use their recipe as a base and make my own changes as per the usual.  I decided upon pumpkin instead of squash as it seemed a  simpler and I had some cans leftover from my pie making in the fall.  I added some spices I love that they don't include such as Garam Masala which gives it a spicy taste rather than just a cinnamon flavor and of course changed the nuts around to how much I had on hand and Voila!

 Pumpkin Nut Bread.

 I know it isn't autumn but this made my house smell so good and helped me have a little closure to the gas leaking scenario I had been dealing with.

  It also made me realize how much I had been paying for a slice of Squash Bread!

 A load of cash!

 Inspiration comes at a price though, so,  Thanks Macarina for the inspiration and thanks Seattle Coffee Shops for keeping me warm.  

Stay warm everyone spring is just around the corner.πŸ’πŸŒ·πŸ’

Pumpkin Spice Nuts and Seed Bread


Ingredients

Dry

  • 540 g or 3 1/2 cups All-Purpose Flour

  • 325 g or 1 1/2 cups sugar

  • 325 g or 1 1/2 cups dark brown sugar

  • 2 tsp baking soda

  • 2 tsp baking powder

  • 1 1/2 tsp kosher salt

  • 1/4 tsp nutmeg

  • 1 tsp cinnamon

  • 1/2 tsp garam masala

  • 1/4 cup toasted pumpkin seeds

  • 1/2 cup toasted sunflower seeds

  • 1/2 cup toasted walnuts chopped

  • 1/2 cup toasted pecans chopped

Wet

  • 1 can of pumpkin (15 1/4 oz can)

  • 4 eggs

  • 1 cup vegetable oil

  • 3/4 cup buttermilk (see tips if you don't have this on hand)

Instructions

Step 1

Toast your nuts and seeds in a cast-iron pan and  add nutmeg and a pinch of salt for some extra flavor in the toasting.  Watch the pan so as not to burn the nuts. Allow to cool!

Step 2

In a large bowl add flour, baking soda, baking powder, cinnamon, garam masala and salt and mix with a whisk.

Preheat oven to 325 degrees F.

  Grind using a mortar and pestle or Coffee/food grinder half of the nut and seed combo but make sure the nuts and seeds are not hot or it will become mush.

Add the ground seeds and nuts to the flour mixing with the whisk and making sure to set aside the other half for topping the bread.

Step 3

With a stand mixer and paddle attachment  place oil and sugars in the bowl and mix on medium speed for about 3-4 minutes. Add the canned pumpkin and mix again for a couple minutes.

Add in one egg at a time until each is well blended with the pumpkin and sugars and oil.

Step 4

Next slowly add in flour alternating with buttermilk until all is combined.  Do not over mix!  Just mix until combined each time you add flour, then buttermilk, then flour etc.

Step 5

I used mini loaf pans and made four loaves at a time.  You will need to oil the pan, you can use spray oil if you have it and if not use a paper towel and wipe with oil all over the pans. Fill pans 2/3 full!  Do not fill to the top or they will not bake properly, I know from experience! 

Top with Toasted Whole Nuts and Seeds before baking.

Pumpkin Nut and Seed Bread

Step 6

Bake in your preheated oven at 325 degrees F for 40-50 minutes. Before removing from oven check that the center comes out clean on a toothpick or wooden skewer. If not leave in longer.  If it seems to be getting to brown tent (like a camping tent) with foil over the top and keep cooking until finished.

Allow to cool in pan about 15-20 minutes then remove and place on wire rack.

Step 7

You can allow to completely cool and then wrap in plastic wrap and then foil and freeze for your next big brunch or just keep in the freezer to eat the next week!

Tips

  • No Buttermilk? Here is what to do: Mix 1 cup of milk and 1 TBSP of Lemon juice or White Vinegar and let sit for 5 minutes until begins to curdle. Strain with a sieve and you have buttermilk

  • Tenting the breads with foil is a great way to prevent too much browning

  • Garam Masala is an Indian Spice that you can blend yourself if you want it includes: cloves,cardamom,cumin,black peppercorn,coriander,cinnamon and nutmeg

  • Pumpkin seeds and sunflower seeds are know to help with cardiovascular health!

Happy Baking and Eating!