Curry Chicken Salad

Boys, I may not know much, but I know chicken poop from chicken salad.
— Lyndon B. Johnson

The first time I did a back dive off the diving board I was scared.😨

  No, more like terrified. 😱

The diving class seemed like a good idea.

  I enjoy swimming. 🏊

It seemed like an easy “A” for a college class.  And I have dove off diving boards since I was a kid in swimming classes. 

It couldn’t be that hard, right?

 It wasn’t a bucket list kind of thing, more like something you do in college when you need physical education points and other options such as team sports or bowling well... they shouldn't be on your list.

That terrifying dive however didn’t last too long. 

I took the plunge!

I did it. 

I followed the basic instructions from the professor and stood tall. Toes on the edge. Arms high above my head. Face looking at the diving board in front of me. 

You don’t jump when you first learn to back dive you sort of glide into the water.  You lean and lean backwards until you see the water coming at you. 

It’s an unusual feeling to have the water come up towards you in reverse, but it is also a slipping into time kind of feeling because it doesn’t seem real. 

If you do it right, you hear the professor’s words in your ears

“ don’t look back, don’t turn around, stand straight. arms back, farther, farther. Reach. Reach.”

...and then the words stop because you are in the water going down. 

It is after that terrifying first moment, it becomes a thrill. 

You get out and want to try again. 

You are proud of yourself! 

You can’t believe you didn’t “bellyflop” “backflop” not sure what the word would be going backwards, but it is a distinguishing moment in a swimmer’s life if they learn to do a backwards dive. 

I’m not saying making a curry chicken salad is the same as taking a back dive, but maybe for you it will take a little strength and courage to do things differently. 

Maybe you always purchase a roast chicken and you decide to roast chicken in you oven yourself using this simple method.

Maybe you have never been much into Indian cuisine and you think you probably won’t like it, but you want to try something new and different. Oh and you heard Turmeric is the new Health Thing! It's True!

  Maybe cooking in general is something you don’t have time for, or have never found much interest in since after all that means you have to wash the dishes afterwards.

Does this sounds like your excuses ?

The reasonings in your head?

Perhaps you might just have that scary diving board lingering in front of you, like I did?

  Is it it time to take the plunge? 

See what this cooking hype is all about? It’s just a Sandwich after all, right? 

I promise it is the little things that make you happy.

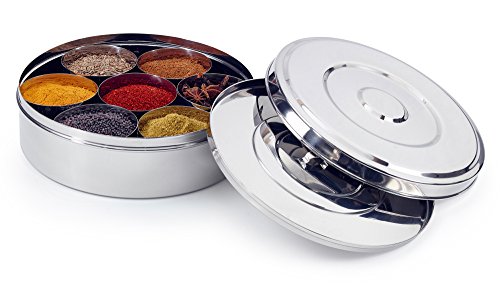
Enjoy scooping up the spices. Blending the flavors.

Spices for Curry Chicken Salad

 If it’s your first dive into cooking or your umpteenth one this, curry chicken salad sandwich is going to become one you do over and over again because after all you took the PLUNGE! 

Kudos to you and Happy Diving, I mean Cooking! 

Ingredients

  • Roast chicken pieces make up 1 1/2 cup of chicken chopped

  • 1/4 cup chopped cashews (toasted is optional)

  • 1/4 cup blanched green peas (How to blanch vegetables...go here.)

  • 2 whites and part of greens finely chopped scallions (green onions)

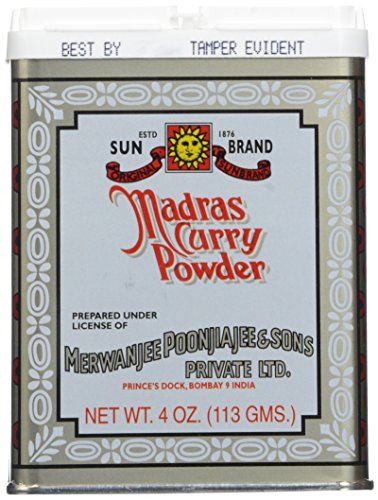
  • 4 teaspoons Indian curry spice (I like Madras unless you have your own blend

  • Sriracha Saffron Mayonnaise (See below) 1/4 cup or plain Mayonnaise with 1 tsp of Sriracha added

  • Salt and Pepper to taste

Step 1

Roast Chicken or if using Store Bought Roasted Chicken Remove chicken both white and brown meat from bones and chop up pieces to preferred size.  For this chicken salad I like my chicken finely chopped not shredded or in large chunks because of the peas and cashew sizes.

Step 2

 In a large bowl add toasted cashews, peas, and scallions to chicken.  Add Mayonnaise and then add curry spices. Using a spatula or wooden spoon mix all ingredients together.  Taste and if more curry flavor is needed add one teaspoon at a time.  Taste again and add kosher salt and ground black pepper.  Do not skimp on salt, make sure and add to taste.  

Step 3

Serve on Bread Rolls removing some of the inside of the  bread and scoop chicken salad placing into the center of the rolls.

Enjoy every Bite!


Tips

  • Use your chicken bones to make homemade chicken stock in a pressure cooker for fast cooking

  • Using brown meat in chicken salad adds more flavor than just using white meat

  • Read Recipe Instructions and ingredients before beginning, it will help you in the long run.

screenshots from food blogger pro

Sriracha Saffron Mayonnaise

  • 1/2 cup Mayonnaise

  • 1/2 tsp grated lemon zest

  • 1/2 TBSP lemon juice

  • 1/2 tsp dijon mustard

  • 1 tsp Sriracha

  • 1/4 tsp saffron threads (soaked in lemon juice)

Whisk all together.


Source: www.thewhiteradish.com

Stuffed Squash for Dinner

I like rice. Rice is great if you’re hungry and want 2,000 of something.
— Mitch Hedberg

  One of the best things about squash is it sits around the house waiting for a while and doesn't mind doing so.

 It doesn't shout out I am turning brown and mushy like a pear, I am going to go bad if you don't eat me today.

 It doesn't wrinkle its forehead like lettuce and say I am tired of waiting.

 In fact, it's the most patient vegetable I know.

 And in this world of honking the horn before the light turns green it's nice to have something that doesn't mind waiting for me.

Patience of the Squash makes time slow down and the art of the table become important. 

That's Squash, always there, ready for me.  

I know it is easier to buy pre-cut squash, but something about the smell of roasting squash in the oven on a cool crisp day brings out the: it's officially autumn in me.

Don't get me wrong pre-cut is a timesaver and I understand and there are those moments when you want it quickly or just don't want to take the extra time to peel, cut, and roast.

However, do you ever notice that the taste is just not quite right?  In the back of your mind you have a subtle nagging feeling of disappointment. 

That's why sometimes the squash sits and waits for me for me on Sunday.

 It's that day when you probably have a little more time.  It's the day you laze around in your pajamas a little longer, or maybe even, gasp, All Day! 

Gotta love that about a lazy day.

 Maybe for you it's not Sunday, maybe it's Monday, cause the kids are back in school and the house is quiet.

 Or maybe you work weekends and your first day off is Wednesday.  

Whatever day you have to linger a teeny bit longer that's the day I encourage, no nudge you, to take the time cut the squash.

To pull out the seeds. 

To glaze it over with olive oil and finger dust it with salt and pepper.  

To smell the sweet scent of patience roasting in your oven. 

Yes, it's the day to make Japanese Stuffed Squash.

  It is gonna be a good day.  I'm glad we shared it together. 

You, Me and the Squash.

Stuffed Squash

Ingredients:

  • 1 kabocha squash aka: japanese pumpkin or 1 acorn squash; cut in half, seeds removed

  • 1-2 Tablespoons olive oil

  • 2 cups of cooked white rice preferably japanese sushi rice

  • 1 pound of ground pork

  • 1/2 teaspoon baking soda

  • 1 thai red chili diced seeds removed for less heat

  • 1 white onion chopped

  • 2 garlic cloves chopped

  • 1 Tbsp fish sauce

  • 1 Tbsp brown sugar

  • 1-2 Tbsp chopped thai basil

  • salt and pepper

  • 2 lime wedges for serving

  • Sriracha for serving

Instructions:

Step 1:

After removing seeds from squash, spread olive oil over inside of squash and sprinkle with salt and pepper.

In a preheated oven at 425 degrees Fahrenheit place squash cut side down on a baking sheet and bake for about 20-25 minutes until squash is tender with a knife inserted.  Set aside.

Step 2:

While squash is roasting in oven, mix with hands baking soda and pork and 1 Tbsp water and set aside while sauteing onions and garlic.  In a large saute pan heat vegetable oil under medium to high heat and then place chopped onion and thai chili and saute for about 5 minutes until translucent. Remember to salt the onions a little while cooking.  Add chopped garlic and cook for about 30 seconds being careful not to burn.  Next place pork and cook until pink is almost removed then stir in fish sauce and brown sugar.  Cook for about 1 minute more and then add cooked rice.  Mix all together and remove from heat.

Step 3: 

Add chopped thai basil and squeeze lime wedge over the top.  Scoop Rice/Pork mixture into each half of squash and serve with lime wedges and Sriracha sauce.

Enjoy bites of squash and bites of rice mixture. YUM!

Tips:

  • Using leftover cooked rice makes this meal simple to prepare.

  • Prepare the squash the day before and reheat before serving.

  • Sprinkle a bit of cayenne as well as salt and pepper over the squash to kick it up a notch!


Buckwheat waffles

A waffle is like a pancake with a syrup trap.
— Mitch Hedberg

I stepped back in time this morning into my grandfather's 1970's  truck camper.  The malty sweet hue drifted into my nose and the crackle cooking swept into my ears.

 "Do you want a lead balloon?" he used to ask me as a child eagerly sitting in the canvas covered bench awaiting what were his buckwheat pancakes.

 "Yes, please. Grandpa." I would respond.

 He would heave one, and if I was lucky two, "lead balloons" onto my plate from the small electric griddle.

 I never knew how he could make them fit the size of the plate with such exactitude, but I loved that I could attempt to drown the pancakes in Knotts Berry farm syrup.  It was always blackberry. The purple hue contrasted well with the spotted cement colored pancakes.  

Our prayer, short and sweet, was still never short enough for the oodles of syrup to be sucked up by the lead balloons.

 I have moved on from lead balloon pancakes to light and yeasty buckwheat waffles, but I continue the tradition of serving them with Marionberry Syrup.  

Berry syrup fills the waffle caves and makes every bite taste just a little bit better. Or maybe it's the fact that I see myself sitting with my Grandpa sharing a hot lead balloon.

Hands up for the life experiences of our grandparents!

 What's your favorite grandparent story?

screenshots from food blogger pro


Recipe adapted from Epicurious

Ingredients

  • 2 1/4 teaspoons or 1 package active dry yeast

  • 1/4 cup warm water

  • 1 teaspoon sugar

  • 2 cups lukewarm milk

  • 1/2 teaspoon salt

  • 1 1/2 cups flour

  • 1 cup buckwheat flour

  • 2 tablespoons sugar

  • 5 tablespoons canola oil or butter, melted

  • 2 eggs, beaten

  • 1/2 teaspoon baking soda

  • 1 cup blueberries

Step 1

In a small bowl, sprinkle the yeast into 1/4 cup warm water and stir in the one teaspoon of sugar. Let stand until foamy, about 10 minutes.

Step 2

Put the warm milk and salt in a large bowl, then add the yeast mixture and whisk in the flours. Cover and refrigerate overnight if the weather is warm or leave out on the counter if it's cool.

Step 3

Next morning, add the sugar, oil, eggs, and soda. Cook according to your waffle iron's instructions. The batter will be thin but a Belgian style waffle maker can be used.

Step 4

Enjoy with Marionberry or Blackberry syrup!